
Crochet Bag: The Complete Guide to Making, Styling & Choosing Your Perfect Handmade Bag
May 12, 2026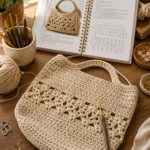
Crochet Bag Pattern: How to Read, Choose & Master Patterns for Beautiful Handmade Bags
May 13, 2026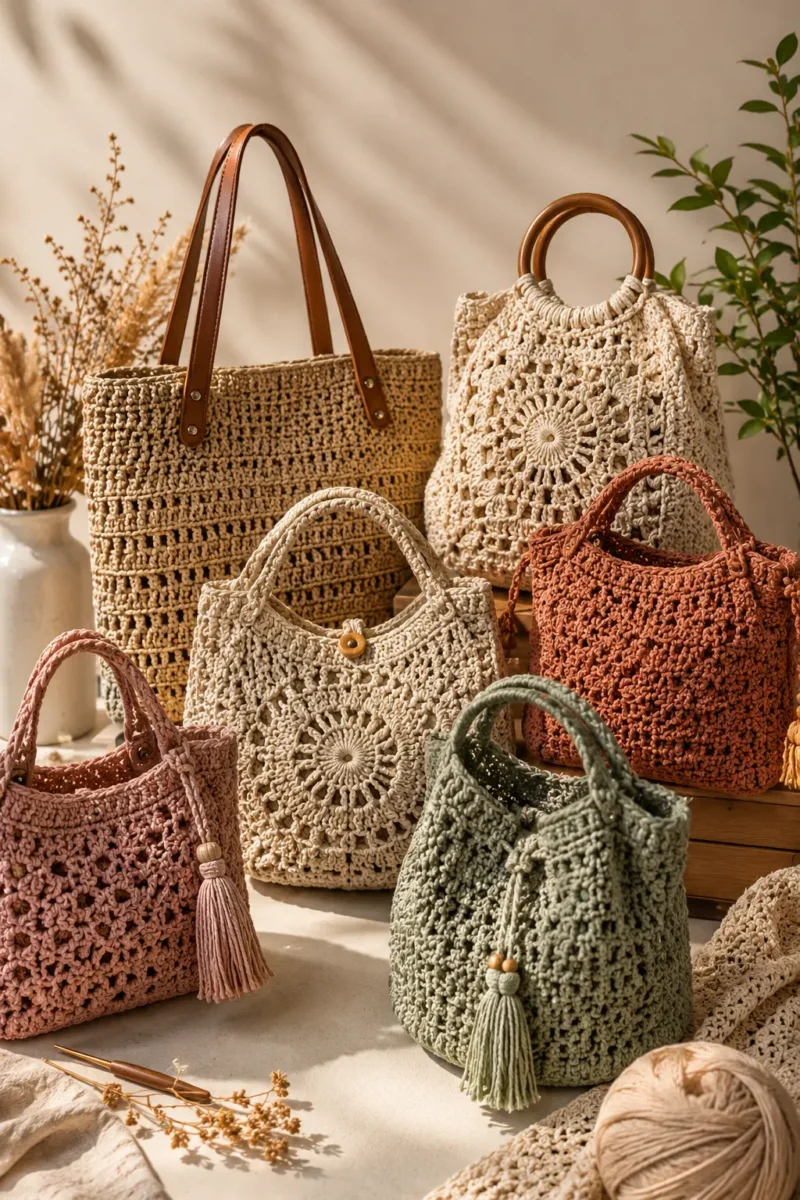
Following a pattern is satisfying, but creating your own design? That’s where the real magic happens. Bag crochet design transforms you from someone who makes bags to someone who invents them—bringing original visions to life through yarn and hook.
Designing your own crochet bags might feel intimidating at first, but it’s more accessible than you think. You don’t need formal training or expensive software. What you need is understanding of basic principles, willingness to experiment, and enough patience to learn from the inevitable trial runs that don’t work out.
This guide walks through the entire design process, from initial concept to finished piece. You’ll learn how professional designers think about shape, color, texture, and function—and how to apply those principles to create bags that are uniquely yours.
What Is Bag Crochet Design?
Bag crochet design encompasses everything involved in creating an original crochet bag: conceptualizing the shape, selecting stitches and colors, planning construction methods, and solving the technical challenges that arise along the way.
It’s different from simply modifying an existing pattern (though that’s a great starting point). True design work means you’re making decisions about every element—from the base shape to the closure method to the strap attachment.
Design skills develop over time. Most designers start by tweaking existing patterns, then gradually attempt more original creations as confidence builds. The goal isn’t perfection on your first try; it’s developing an eye for what works and why.
The Design Process: From Concept to Creation
Professional designers follow a process that reduces guesswork and improves outcomes. Here’s a framework you can adapt:
Phase 1: Inspiration and Research
Start by gathering images of bags you love—crochet and otherwise. Look at fashion magazines, Pinterest boards, vintage patterns, and everyday objects. Notice what draws your eye: specific shapes, color combinations, textures, or functional features.
Create a mood board (digital or physical) for each project. This clarifies your vision before you start crocheting.
Phase 2: Concept Development
Define your bag’s purpose and parameters:
- What will it hold?
- Who is it for?
- Where will it be used?
- What’s the desired aesthetic?
These answers guide every subsequent decision.
Phase 3: Sketching and Planning
Rough sketches don’t need to be artistic—stick figures and basic shapes work fine. The point is getting ideas out of your head and onto paper where you can evaluate them.
Draw the bag from multiple angles. Sketch handle options, closure ideas, and pocket placements.
Phase 4: Technical Planning
Determine construction method, stitch selection, yarn requirements, and any special techniques needed. This is where design becomes engineering.
Phase 5: Prototyping
Make a test version—ideally in inexpensive yarn. This reveals problems before you invest time and materials in the final piece.
Phase 6: Refinement
Adjust based on what you learned from the prototype. Sometimes multiple iterations are needed.
Phase 7: Final Execution
Create the polished version with your chosen materials and finish it properly.
Understanding Bag Anatomy
Before designing, understand the parts you’re working with:
Base
The bottom of the bag. Can be flat (rectangular, oval, circular) or pointed (triangular). Base shape determines overall silhouette.
Body
The main structural portion. Can be worked in one piece with the base or attached separately.
Opening
How you access the bag’s contents. Consider width, shaping, and closure method.
Gusset
Side panels that add depth. Not all bags have gussets—their presence or absence dramatically changes the shape.
Straps/Handles
How you carry the bag. Options include short handles, shoulder straps, crossbody straps, drawstrings, or backpack-style configurations.
Closure
What keeps the bag shut. Zippers, buttons, magnetic snaps, drawstrings, flap closures, and toggle closures all work differently.
Interior Features
Pockets, dividers, key clips, and other functional elements.
Choosing Your Bag Shape
Shape is the most fundamental design decision. It determines everything else—construction method, material requirements, and how the finished bag functions.
Classic Shapes and Their Characteristics
Rectangular/Square Tote
The most straightforward shape. Great for beginners. Works for nearly any purpose. Construction is simple: flat base, straight sides, handles at top.
Bucket Bag
Cylindrical or conical shape with a drawstring closure. Trendy and practical. The circular base requires working in the round.
Crossbody/Saddle Bag
Small to medium rectangle with a long strap. Often includes a flap closure. Good for everyday carry.
Clutch
Small, handheld, minimal or no strap. Works for dressy occasions. Can be envelope-style, zippered, or fold-over.
Hobo Bag
Crescent-shaped, slouchy, usually with a shoulder strap. The curved shape requires shaping techniques.
Backpack
Two straps, larger capacity, worn on the back. More complex construction but extremely practical.
Market/Net Bag
Open-weave design that expands to hold more. The mesh construction requires specific stitch patterns.
Matching Shape to Purpose
Consider how the bag will be used:
- Grocery shopping → expandable market bag with sturdy handles
- Daily essentials → crossbody with secure closure
- Beach trip → large tote with mesh sections for sand drainage
- Evening out → compact clutch with elegant details
- Travel → backpack with multiple compartments
Color Theory for Crochet Bags
Color choices make or break a design. Understanding basic color theory helps you create combinations that feel intentional rather than accidental.
The Color Wheel
Colors are organized by their relationships:
- Primary colors: Red, blue, yellow
- Secondary colors: Orange, green, purple (made by mixing primaries)
- Tertiary colors: Red-orange, blue-green, etc.
Color Schemes That Work
Monochromatic
Different shades of one color. Creates sophisticated, cohesive looks. Easy to execute successfully.
Analogous
Colors next to each other on the wheel (e.g., blue, blue-green, green). Harmonious and pleasing to the eye.
Complementary
Colors opposite each other on the wheel (e.g., blue and orange). Creates energy and contrast.
Triadic
Three colors equally spaced on the wheel. Bold and vibrant but harder to balance.
Neutral Plus One
Neutral base (cream, gray, black, tan) with a single accent color. Versatile and wearable.
Practical Tips
- Consider wearability. Neutrals pair with more outfits than statement colors.
- Test yarn colors together. What looks good on screen may not work in person.
- Account for color pooling. Variegated yarns can produce unexpected effects.
- Think about the season. Earthy tones for fall, bright colors for summer.
- Check colors in different lighting. Natural and artificial light change how colors appear.
Texture and Stitch Selection
Texture adds visual interest and affects function. Different stitches create different surfaces, and your choices should support the bag’s purpose.
Smooth, Dense Stitches
Best for: Structured bags, everyday use, items requiring durability
Examples: Single crochet, waistcoat stitch, moss stitch
Textured Surface Stitches
Best for: Visual interest, hiding imperfections, casual bags
Examples: Bobble stitch, popcorn stitch, puff stitch, alpine stitch
Cable and Post Stitches
Best for: Adding dimension without openwork, sweater-like appearance
Examples: Front post/back post double crochet, cable patterns
Open/Mesh Stitches
Best for: Market bags, beach bags, decorative overlays
Examples: Chain mesh, Solomon’s knot, filet crochet
Colorwork Techniques
Best for: Patterns, images, bold graphic designs
Examples: Tapestry crochet, intarsia, planned color pooling, granny squares
Mixing Textures
Combining textures adds sophistication. Consider:
- Textured body with smooth straps
- Plain panels with decorative borders
- Subtle texture variations between sections
Planning Functional Features
Great design balances aesthetics with usability. Think through practical elements during the planning phase—not as afterthoughts.
Closures
Drawstring
Simple, no hardware needed. Works well with bucket shapes. The gathered top adds visual interest.
Magnetic Snap
Clean, invisible closure. Requires sewing into lining or reinforced panels.
Button and Loop
Classic look, easy to add. Works on flap closures.
Zipper
Maximum security, requires sewing skills. Usually integrated with lining.
Flap Closure
Decorative and functional. Can combine with other closure methods.
Pockets
Pockets dramatically improve functionality. Plan them early—adding pockets to finished bags rarely looks right.
Interior Slip Pockets
Sewn into the lining, invisible from outside.
Exterior Patch Pockets
Visible and accessible, become part of the design.
Zippered Pockets
Secure storage for valuables.
Hardware Integration
Plan hardware placement before you start crocheting:
- Strap attachments (D-rings, swivel clasps)
- Bag feet for bottom protection
- Grommets for drawstrings
- Decorative rings or buckles
Linings
Most functional bags need lining. Consider:
- Fabric type (cotton for casual, satin for dressy)
- Color (coordinate or contrast)
- Interfacing needs
- Pocket integration
Sketching and Prototyping
You don’t need artistic talent to sketch useful design plans. Simple shapes and notes work fine.
Sketching Tips
Draw from multiple angles:
- Front view (overall shape, decorative elements)
- Side view (depth, gusset shape)
- Top view (opening shape)
- Bottom view (base shape, feet placement)
Include measurements, even if estimated. Note stitch ideas, color placement, and construction sequence.
The Value of Prototypes
Never skip prototyping for a new design. Use inexpensive yarn in a similar weight to your final choice. The prototype reveals:
- Whether your measurements create the intended size
- How the shape actually looks in three dimensions
- Construction problems you didn’t anticipate
- Whether your stitch choices work for the structure
Prototypes aren’t wasted time—they’re investments that prevent expensive mistakes.
Calculating Yarn Requirements
Running out of yarn mid-project is a designer’s nightmare. Calculate carefully:
Method 1: Gauge-Based Calculation
- Create a gauge swatch and weigh it
- Calculate total surface area of your bag
- Divide total area by swatch area
- Multiply by swatch weight
- Add 20-30% buffer
Method 2: Reference Similar Projects
Find patterns for similar-sized bags and note their yarn requirements. Adjust based on your stitch density.
Method 3: Work a Section and Scale
Crochet one panel or section of your bag, weigh it, then multiply by the number of sections plus straps and finishing.
Always Buy Extra
Dye lots vary between production runs. Buy all your yarn at once, and purchase 20-30% more than your calculations suggest.
Common Design Mistakes to Avoid
Learn from others’ errors:
Overcomplicating Early Designs
Start simple. Master basic construction before adding complex features.
Ignoring Proportions
Straps that are too thin, bases that are too small, handles that are too short—proportion problems ruin otherwise good designs.
Forgetting Function
A beautiful bag that doesn’t close properly or won’t hold its contents isn’t a successful design.
Skipping the Prototype
Every experienced designer has learned this lesson the hard way.
Not Planning for Weight
Heavy items stretch crochet fabric. Design reinforcement into bags meant for heavy loads.
Choosing Style Over Wearability
That lime green and hot pink colorblock might look amazing on paper but unwearable in real life.
Finding Your Design Style
Your unique design voice develops over time. Speed up the process:
Study What You Love
Analyze bags you’re drawn to. What do they have in common? Those elements likely reflect your aesthetic preferences.
Document Everything
Keep a design journal with ideas, sketches, and notes on what worked and what didn’t.
Embrace Constraints
Limitations spark creativity. Try designing within specific parameters—a single color, a certain size, a particular technique.
Look Beyond Crochet
Fashion design, architecture, ceramics, and nature all offer inspiration for bag design.
Create Consistently
Design skills improve through practice. Set goals to design regularly, even when you’re not sure the ideas are good.
FAQ
How do I start designing my own crochet bags if I’ve never done it before?
Begin by modifying existing patterns. Change colors, swap stitch patterns, adjust proportions, or add simple features. This builds skills gradually while limiting variables.
Do I need special software to design crochet bags?
No software is required. Paper sketches, a ruler, and a calculator handle most design work. However, some designers use graph paper, spreadsheet programs, or dedicated crochet charting software.
How do I know if my design will hold together structurally?
Prototyping is the only reliable test. Create a sample version and stress-test it: load it with weight, use it for a day, wash it if appropriate. Problems reveal themselves quickly.
Should I design the pattern for others to follow, or just for myself?
Start designing for yourself—fewer constraints, faster iteration. Once you’re confident in your designs, you can learn pattern writing if you want to share or sell them.
How do I price bags I’ve designed myself?
Consider materials cost, time invested, design development time, and market comparisons. Original designs typically command higher prices than pattern-based work.
What if my design doesn’t work out?
Every failed design teaches something. Document what went wrong, adjust your approach, and try again. Even experienced designers produce more abandoned concepts than finished pieces.
How do I protect my original designs?
Original pattern instructions are protected by copyright automatically. Physical designs are harder to protect. Focus on building a reputation for quality and originality rather than trying to prevent copying.
Conclusion
Bag crochet design opens a world of creative possibility. Instead of being limited to others’ patterns, you can create exactly what you envision—bags that fit your needs, reflect your aesthetic, and exist nowhere else in the world.
Start with simple modifications to existing designs, then gradually attempt more original work as your confidence builds. Every designer’s portfolio includes early projects they’d rather forget—that’s part of the learning process.
The skills you develop translate beyond bags. Understanding construction, proportion, color, and texture makes you a better crocheter overall. And there’s deep satisfaction in carrying something you not only made but truly designed from scratch.
Your first original design is waiting. Sketch an idea, grab some inexpensive yarn, and start prototyping.